DIY: Dye Your Own Speckle Yarn

Let's talk about dyeing yarn! Have you ever tried it? Dyeing your own yarn can sound daunting, and the truth is, it is actually a big crafting commitment, especially if you live in a city like we do, without a lot of space to spread out.
So, driven by our desire for cute, custom-dyed yarn but lacking the space for a serious dye set-up here in NYC, we came up with a really easy way to dye speckled multi-colored yarn that is crazy easy, super quick, and most importantly: VERY CUTE YOU GUYS.
Our genius hack? We used spray dye (SEI Tumble Dye) to quickly and easily create multi-colored speckle-dyed yarn with no mixing, no water required, and instant results. This is a really fun craft that requires basically no skills and only a few simple supplies.
Want to learn how to do it? Let's go!
Materials

This project requires very minimal supplies and equipment, which makes it really easy to just jump right in. We used 100% wool yarn for this tutorial and we have not yet tested other yarn types, so for best results we suggest using the same yarn as we did. That said, generally any 100% animal fiber yarn should have similar results.
What You'll Need:
- Yarn in white or cream color; we used Cascade 220 in Natural which you can purchase in our online store here. (We ship worldwide!)
- SEI Tumble Dye spray dye -- available in our online store here. (We ship worldwide!)
- Plastic tablecloth or garbage bags to protect your work surface
- Rubber gloves, if you prefer
- Optional: iron or hair dryer for heat setting (more on that below)
Instructions
 To begin, untwist the skein of yarn into a hank (that's the term for the big loop of yarn) but keep any ties intact so that the yarn stays in the loop shape and doesn't tangle. If you purchased yarn that was already in a ball, wind the yarn into a big loop by placing it around the back of a chair, and secure the loop by tying it with yarn in a couple of spots.
Spread out the yarn on a protected work surface, and separate the strands of yarn so that they're spread open a bit.
Note, we dyed our yarn dry, but you can also choose to thoroughly wet your yarn before dyeing it. When the fibers are wet, the dye will absorb more quickly and will spread a bit -- so if you prefer a spread-out look for your dyed sections, you can try wetting the yarn first.
We did not want our dye to spread much because we wanted distinct speckles, and we also wanted this to be QUICK AND EASY, so we're working on dry yarn here!
 Next, just start spraying! This dye is ready to use straight out of the bottle, so just uncap it, shake, and go.
 As you spray each section, use your fingers to move the yarn around so that the spray will make contact with as many strands as possible (including the underside of strands). However, it's also fine if you miss some spots, because that will just add to the speckled effect. There's really no right or wrong here -- it's just a question of more or less color.
  Then just work your way around the yarn, adding color wherever you fancy! Here's how we spaced our colors. We dyed sections about 2" wide, separated by un-dyed sections about 4" wide. Of course, you can vary this however you like, and part of the fun is trying different patterns to see what you get! Again, no right or wrong in this situation.
 Once you're happy with the dye placement, allow the skeins to dry. Now all that's left to do is set the dye with heat.
Heat Setting
Tumble Dye must be heat-set to lock in the color. There are a few options for how to to do this:
In a Clothes Dryer: The Tumble Dye package directions suggest placing your dyed item in the dryer to heat set the dye. The problem with this method is that some yarn will felt in the dryer, so it's risky. If you're using a superwash yarn, this is a bit safer. Try at your own risk! :)
With a Hair Dryer: You can use a hair dryer on "hot" to set the dye. Just use the dryer to apply heat to each dyed section for at least a few minutes. Try not to let the dryer agitate the yarn too much; just point it in one direction and hold it in place for a few minutes, then move to the next section. (Agitation can create a risk of felting.)
With an Iron: Simply iron your (dried) hank of yarn on the wool setting, applying the iron to each section for a few minutes, then flipping the hank inside-out and ironing again to be sure the heat reaches all the strands. (We suggest using a pressing cloth over the yarn to prevent any risk of scorching the yarn or transferring dye to the iron.)
The Results!
Once your yarn is heat set, it's ready to knit, crochet, weave, make pom-poms, or simply hold in your hand and admire! Check out the finished looks you get with this easy method:
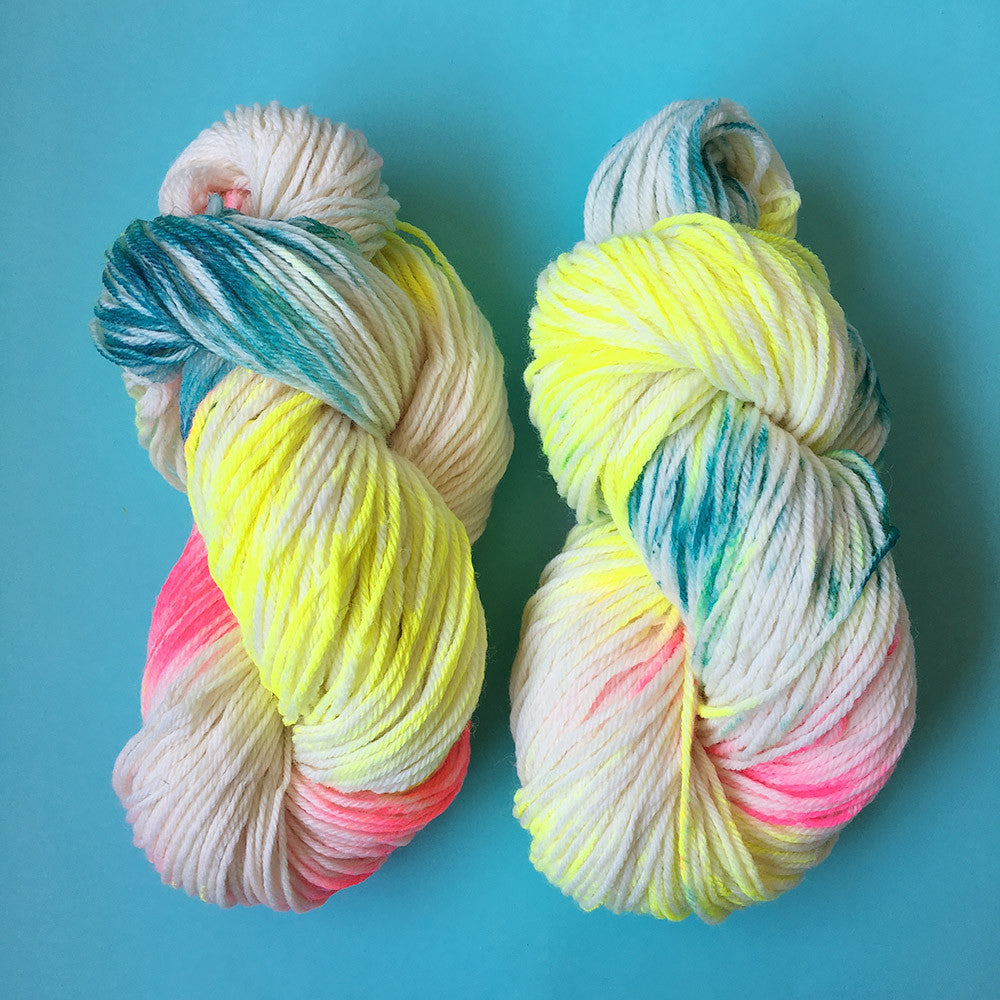
 When you twist the yarn into a skein, it becomes a dreamy, swirling mesmerizing color party!
 Wound into a cake, the sections of color throughout the yarn are separated, so the colors take on a fun confetti look.
 And here's how it looks knit up in garter stitch. Can we just say, YAY!!
So there you have it! A super quick, easy, instant-gratification method to dye your own speckle yarn! Have fun creating your own custom color combos and experimenting for different effects.
If you want to try this project at home, click here to purchase the yarn we used and click here to purchase the dye from our online store. We ship worldwide!
We would love to see how your yarn turns out, so please post pictures of your speckle-dyed yarn and tag us @brooklyncraftcompany and #brooklyncraftcompany.
Happy dyeing!!!
|
Posted on May 18 2017